- Install SureFeedback & Addons
- Update SureFeedback
- Main Site Or Dedicated Installation?
- Caching & SureFeedback
- Dashboard Shortcode
- Project Shortcode (Below 3.1.x)
- Project Shortcode
- Hosting
- Cloudways Compatibility
- Activate SureFeedback License
- Subscribed Projects Shortcode (Below 3.1.x)
- Customization Settings
- Emails
- Permissions Cheatsheet
- Slack Integration
- Export Comments in PDF / CSV
- Known Issues
- Increasing WordPress Memory Limit
- WPEngine Cache Exclusion
- Litespeed Caching
- Emails Not Sending
- Flywheel Compatibility
- Debugging
- Varnish Caching
- Gridpane Compatibility
- Chrome Incognito: Session Expired Notice
- Breeze Compatibility
- W3 Total Cache Compatibility
- Website Comments Not working
- Swift Performance Caching
- Flywheel Cache Exclusion
- WPRocket Compatiblity
- Manage Licenses
- Generate Invoice
- Download Failed: Unauthorized
- Translate SureFeedback
- Client & Colleague Accounts
- Provide Project Access
- SureFeedback On External Site
- WPML For Multilingual Sites
- Automating SureFeedback Workflows With OttoKit
How to Activate your SureFeedback License?
SureFeedback comes with extensive features and integrations that will help you manage all website & design-related feedback.
Once you have bought the SureFeedback plugin, you’ll get your license key based on your plan.
To activate SureFeedback for your website all you need to do is follow these simple steps.
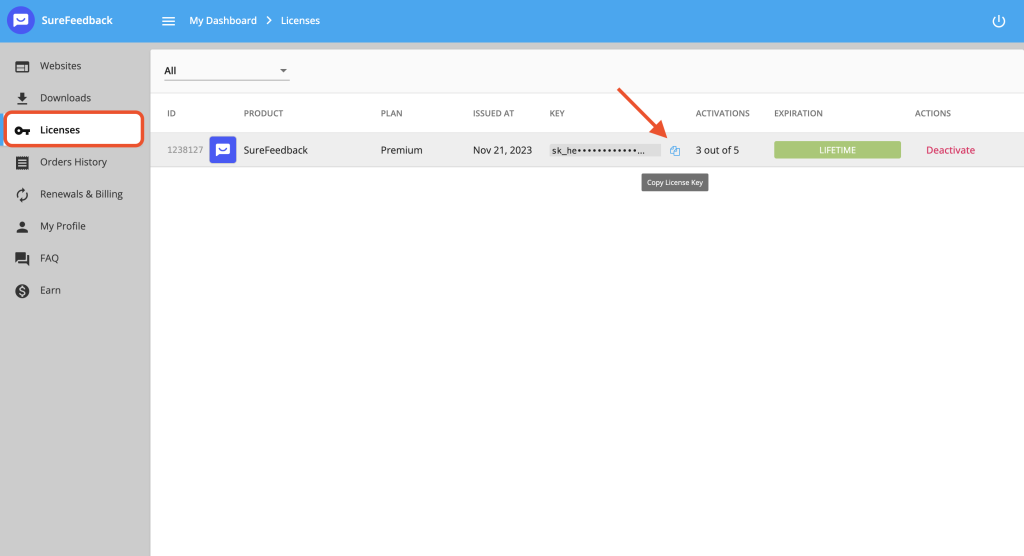
Step 1: Visit our store and log in to get the license key. Navigate to My Dashboard > Licenses. Click the Copy icon to copy the key value.

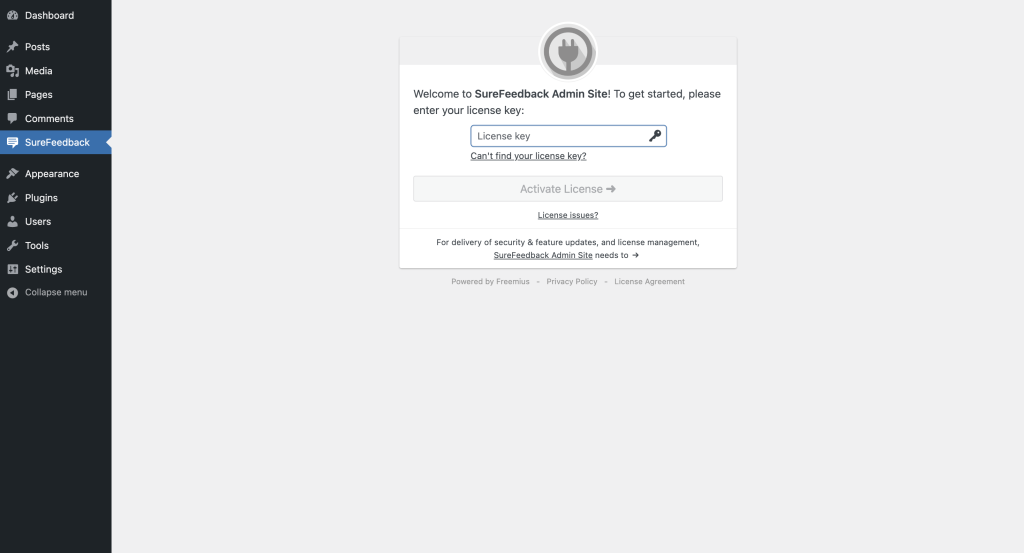
Step 2: Install the plugin on your WordPress website. After successful installation, a popup will open where you have to paste the copied key value.
Click on the “Activate License” button and your license will be activated and running.

That’s it. Your SureFeedback license is now activated.
For any questions, feel free to open a ticket below!
We don't respond to the article feedback, we use it to improve our support content.