No results found. Try again with different words?

Search must be at least 3 characters.

Adding a New Mockup Project

Navigate to Mockups > Add New from your WordPress admin panel to begin. First, give your project a title. This title will also appear on the front end and be visible to the client. 

Note: In order to save any changes made to the following options explained below you must click Publish or Update. Even though your project is “published” your client will not be able to see it until you share the link. 

Adding Images

Begin creating your project by adding images. Click Add Images and choose existing images from your WordPress site media gallery or upload new ones. You can add as many images as you like. 
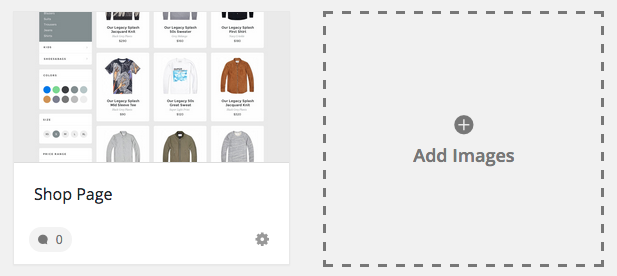
Change the order that the images will appear on the front end by dropping and dragging. Simply hover over the image, click and drag it to it’s new position. Click  Publish or Update to save the project. 

Image Title

The title of the image will appear on the front end of your project and be visible to the client as well. Change the title by clicking on the title area and entering the new title. Click, Set Title to change then click Publish or Update to save the project. 

Image Settings

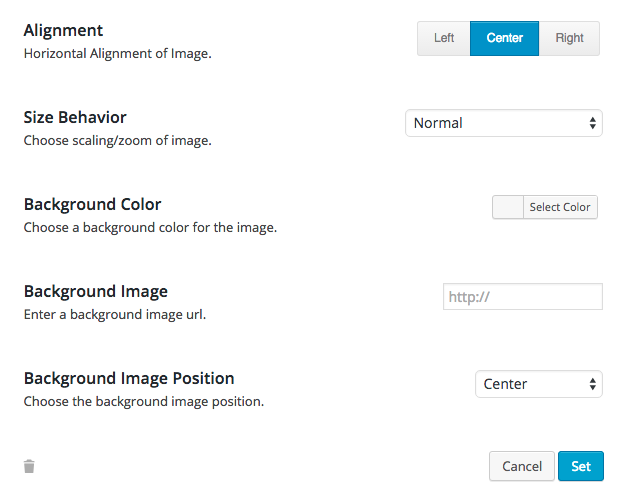
To change the specific settings for an image click the gear symbol in the bottom right corner of that image. After you change the settings listed below, click Set and then click Publish or Update to save the project changes.
Project Options

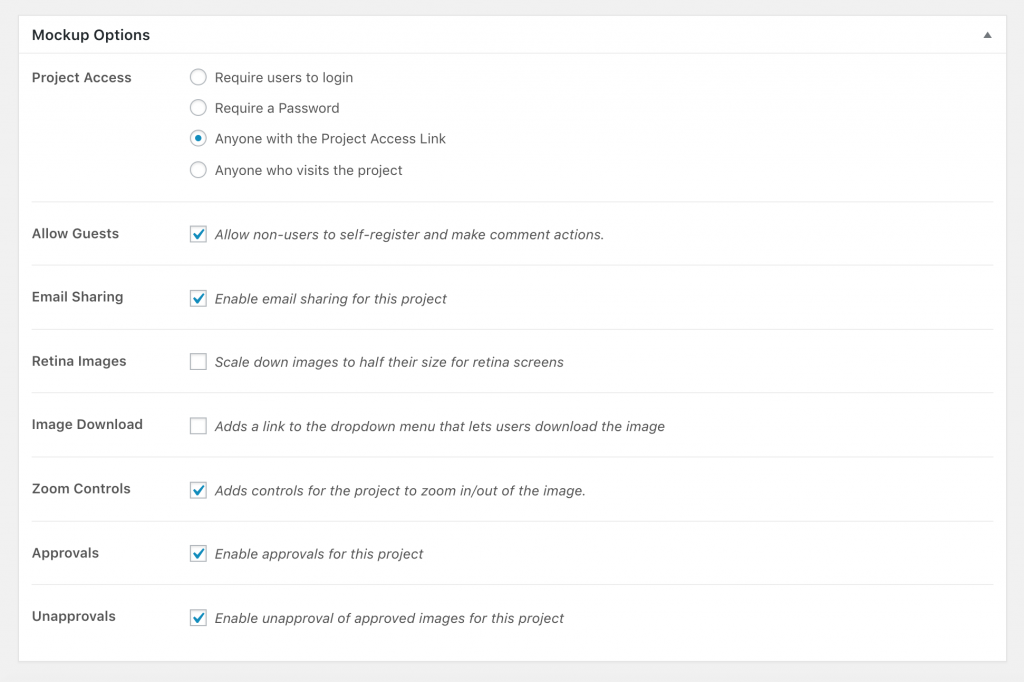
These additional options adjust the settings for the entire project. Remember to click Update or Publish to save any changes that were made.

Below a few of the less “self-explanatory” options are explained. See the screenshot further below for the rest of the mockup project options. 

Project Access

Select Require Users to Login where they’ll need to sign in using an email and password set up on your WordPress site in order to view the project. 

Require a Password prompts the WordPress default password protected post to be enabled. Enter a password to be required for viewing the project. 

Select  Anyone with a Link and anyone can access the project when they know the encrypted link. 

Allow Guests

Tick this box if you want to  Allow Non-Users to Comment. Keep in mind, if you’ve selected Require Users to Login above, then non-users will not be able to comment, even if this is selected.

Approvals and Unapprovals

Tick these boxes to enable or disable the approval / unapproval button for your project.  
Email Notifications 

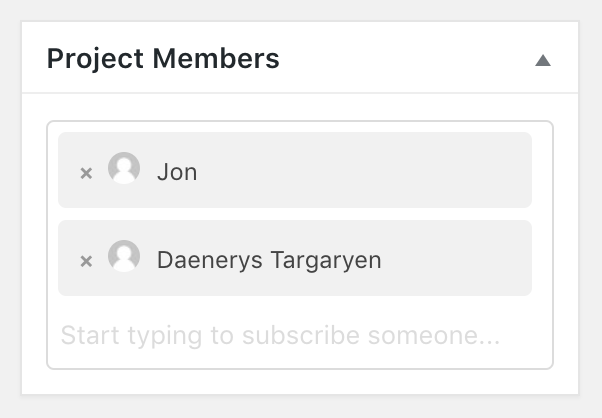
The admin is able to remove users from the email notification list of a project. Simply ‘untick’ the X next to user’s name to remove them from receiving notifications. To add a member begin typing their name to subscribe. Note: The user must already be added under Users > Add New from the main WordPress admin menu.  Check out the following articles on Emails and Creating Users Accounts to learn more. 
Was this article helpful?


Did not find a solution? We are here to help you succeed.

Adding a New Mockup Project

Navigate to Mockups > Add New from your WordPress admin panel to begin. First, give your project a title. This title will also appear on the front end and be visible to the client. 

Note: In order to save any changes made to the following options explained below you must click Publish or Update. Even though your project is “published” your client will not be able to see it until you share the link. 

Adding Images

Begin creating your project by adding images. Click Add Images and choose existing images from your WordPress site media gallery or upload new ones. You can add as many images as you like. 

Change the order that the images will appear on the front end by dropping and dragging. Simply hover over the image, click and drag it to it’s new position. Click  Publish or Update to save the project. 

Image Title

The title of the image will appear on the front end of your project and be visible to the client as well. Change the title by clicking on the title area and entering the new title. Click, Set Title to change then click Publish or Update to save the project. 

Image Settings

To change the specific settings for an image click the gear symbol in the bottom right corner of that image. After you change the settings listed below, click Set and then click Publish or Update to save the project changes.

Project Options

These additional options adjust the settings for the entire project. Remember to click Update or Publish to save any changes that were made.

Below a few of the less “self-explanatory” options are explained. See the screenshot further below for the rest of the mockup project options. 

Project Access

Select Require Users to Login where they’ll need to sign in using an email and password set up on your WordPress site in order to view the project. 

Require a Password prompts the WordPress default password protected post to be enabled. Enter a password to be required for viewing the project. 

Select  Anyone with a Link and anyone can access the project when they know the encrypted link. 

Allow Guests

Tick this box if you want to  Allow Non-Users to Comment. Keep in mind, if you’ve selected Require Users to Login above, then non-users will not be able to comment, even if this is selected.

Approvals and Unapprovals

Tick these boxes to enable or disable the approval / unapproval button for your project.  

Email Notifications 

The admin is able to remove users from the email notification list of a project. Simply ‘untick’ the X next to user’s name to remove them from receiving notifications. To add a member begin typing their name to subscribe. Note: The user must already be added under Users > Add New from the main WordPress admin menu.  Check out the following articles on Emails and Creating Users Accounts to learn more. 

Leave a Reply

Your email address will not be published. Required fields are marked *

LET’S GET STARTED

Ready to Give It a Try?

Start Your Free 14-Day Trial Now. No Obligation. No Reason Not To.

Trial Icon

14 Days Free Trial

Experience Our Platform Risk-Free

Docs Icon

Documentation

Articles that cover common questions

24/7 World Class Support Team

Friendly Support

Reach Out – We’re Here to Help

Scroll to Top