Getting Started With SureFeedback SaaS
Starting with user feedback shouldn’t feel complicated. Whether you’re a business owner, designer, or developer, capturing feedback on your website should be simple and that’s what SureFeedback is all about!
In this article, you’ll learn how SureFeedback helps you quickly connect your WordPress site, gather valuable feedback, and make smarter decisions based on real user insights. We’ll walk you through every step of adding your first website, right from registering an account to verifying your connection.
Let’s get started!
What Is SureFeedback?
SureFeedback is a feedback management tool that lets you easily collect, organize, and act on feedback from your website visitors or clients, all in one place.
Instead of sorting through emails or chat messages, you’ll have everything neatly managed inside your SureFeedback dashboard. You can use SureFeedback to:
- Gather actionable insights from clients and stakeholders on live designs.
- Organize feedback by project or website for easy tracking.
- Collaborate with your team, streamline reviews, and improve faster.
How to Sign Up for SureFeedback
Getting started with SureFeedback is super simple. Here’s how you can set up your account in just a few clicks:
- Visit the following link: https://app.surefeedback.com/
- Sign up using your email address and create a password.
- Log in to your SureFeedback dashboard and you’re ready to roll!
Adding Your First WordPress Website
Once your account is set up, it’s time to connect your first website. Here’s how you can do it:
Step 1: Add a New Site
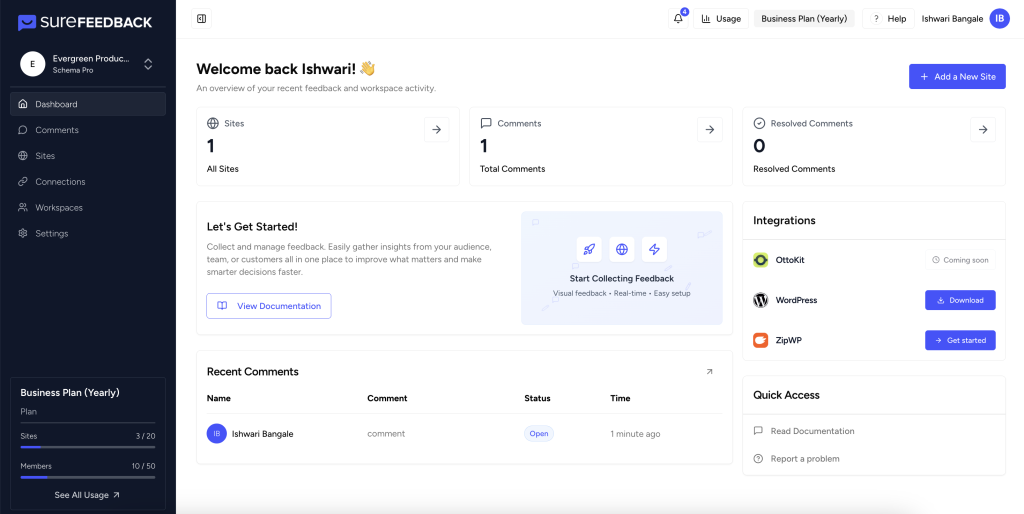
- In the dashboard, click on the Add New Site button located at the top right corner. This will start the process of adding your website to SureFeedback.
Step 2: Choose ‘WordPress’ as Website Type
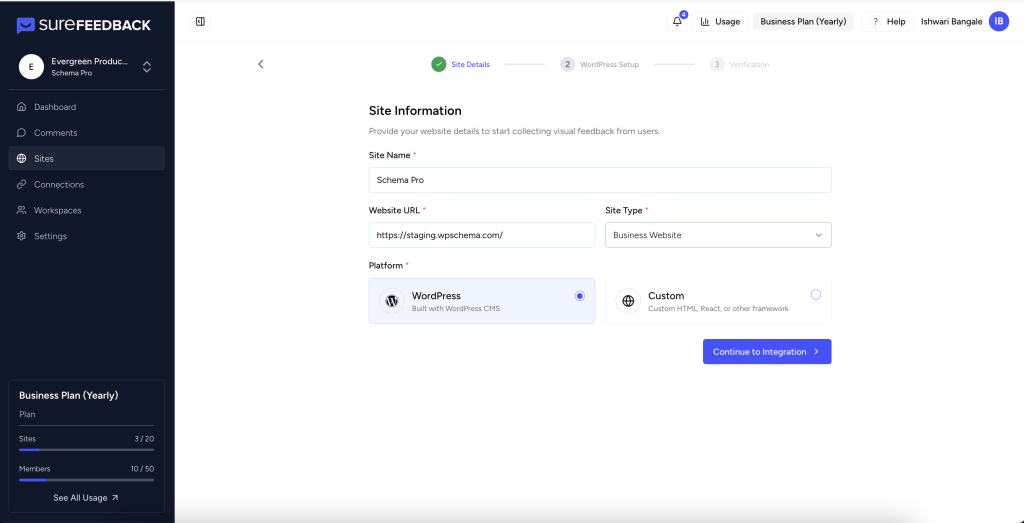
- In the setup options, select WordPress for your website platform.
Step 3: Enter Your Site Details
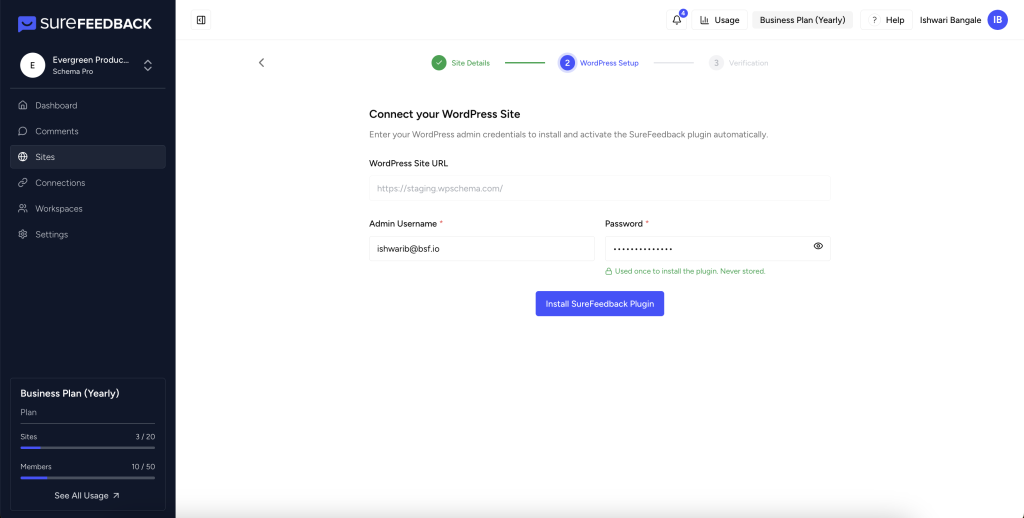
- Enter your WordPress site URL.
- Fill in your WordPress admin username and password. This information allows SureFeedback to set up the connection automatically.
- Make sure your credentials are correct and up to date for smooth installation.
Step 4: Click ‘Install Plugin’
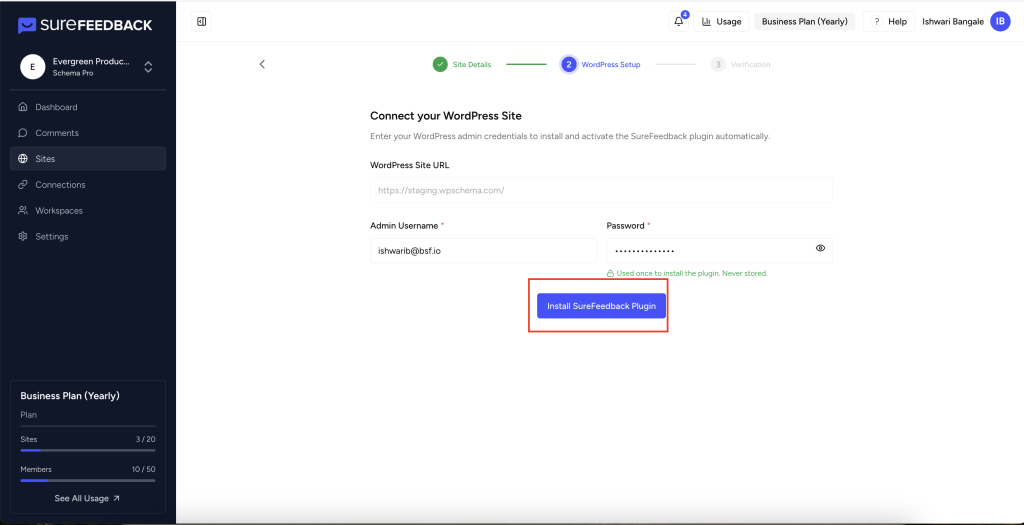
- Click the Install Plugin button. SureFeedback will handle the plugin installation on your website automatically, no manual upload needed!
Step 5: Confirm and Verify
- After installation, you’ll be prompted to verify the site connection.
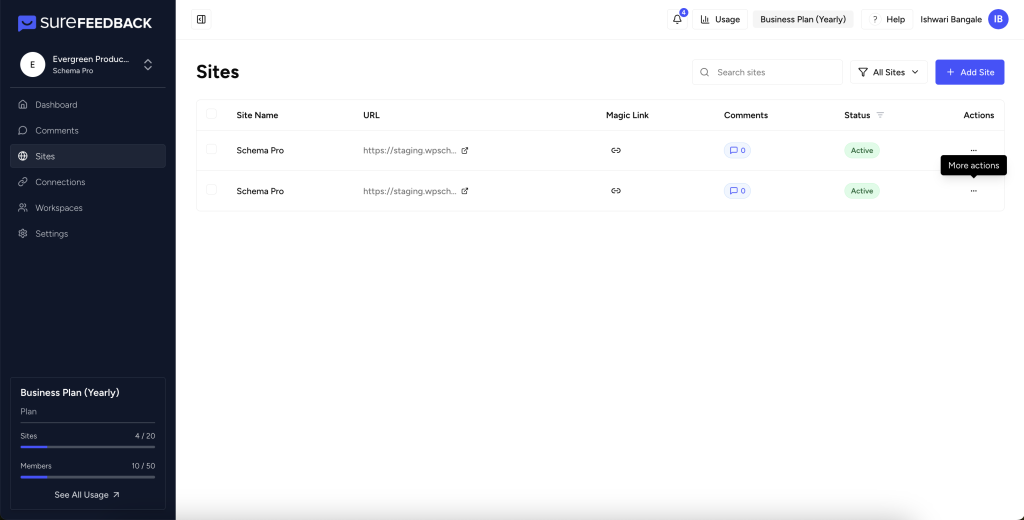
- Follow the on-screen instructions to confirm that everything is set up correctly. Once verified, your website will appear in your SureFeedback dashboard and in the Sites tab, ready to start collecting feedback.
Step 6: Start Adding Comments
- Now that your website is connected, visit the Sites tab in your dashboard and access the site through the Magic Link, or you can access it by clicking on “generate magic link” at the end of the site setup wizard
- You can start adding comments and collaborating with your team and clients directly on your website pages.

What Happens Next?
With your website added, you can now:
- Invite colleagues or clients to review and comment on your projects.
- Organize feedback by site, page, or project for maximum clarity.
- Access quick dashboards that track comments, users, and overall feedback trends.
If you’re ready to gather smarter feedback, you’re all set!
Need Help?
Reach out via the Report a problem link in your SureFeedback dashboard anytime you need assistance. Our team is here to ensure your setup and feedback collection process is as smooth as possible.
We don't respond to the article feedback, we use it to improve our support content.