How to Connect a WordPress Site on SureFeedback SaaS?
Adding your WordPress site to SureFeedback only takes a few minutes. You can start gathering comments and insights from your website right away by following these steps.
Step 1: Log In to SureFeedback
First, go to app.surefeedback.com
and log in with your email and password.
If you do not have an account, create one by selecting the sign up for free option.
Step 2: Add a New Site
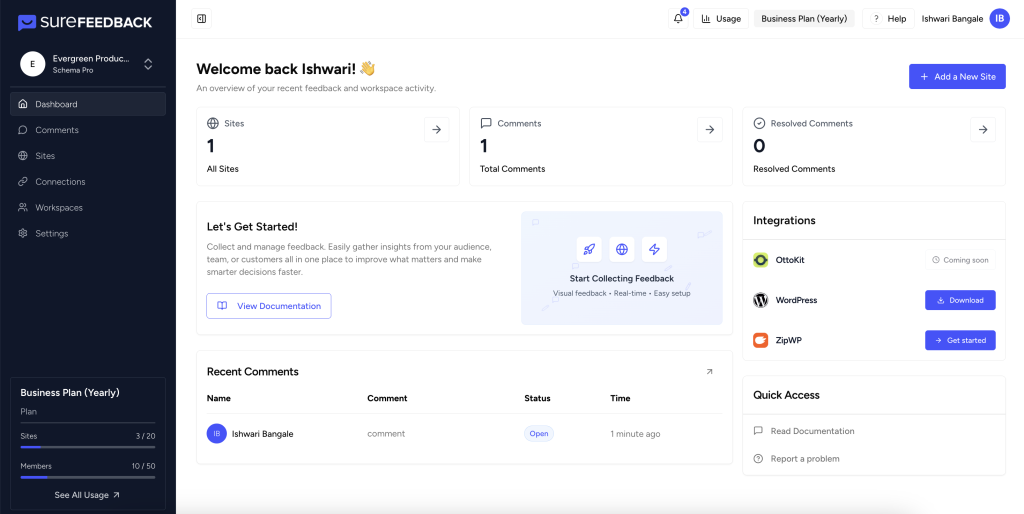
From your dashboard, click on the “Add New Site” button at the top right.
This starts the process for connecting your WordPress website.

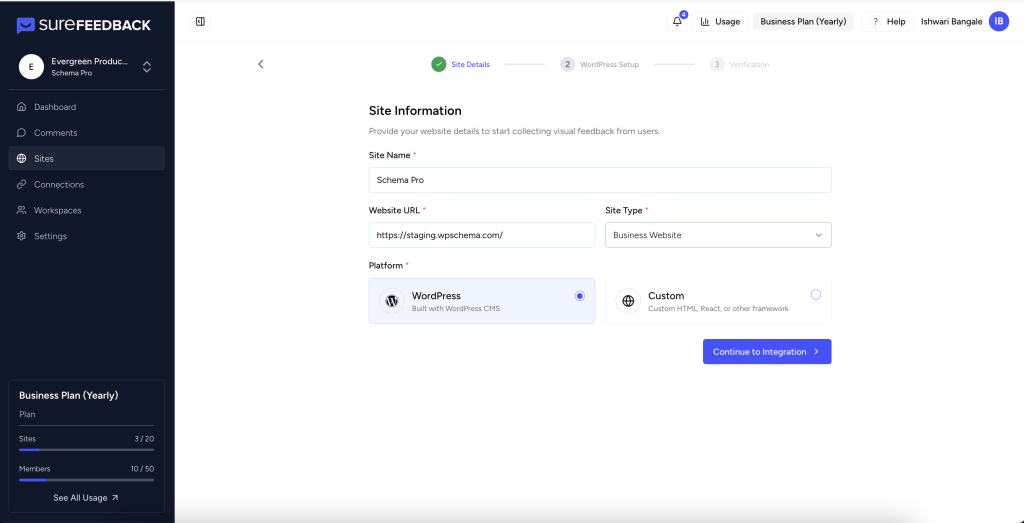
Step 3: Enter Your Website Details
Paste your WordPress site URL.
Check that you use the correct details to avoid connection issues.
Choose WordPress as the Platform

Select “WordPress” as your website platform from the available options.
Step 5: Continue the Installation
Click the “Continue Integration” button.
SureFeedback will handle plugin installation automatically, no manual steps are needed. If in case the connection fails, SureFeedback will provide you the plugin zip right in the process. Just add that zip in your WordPress > plugins > add new plugin section. Or refer this documentation for plugin installation
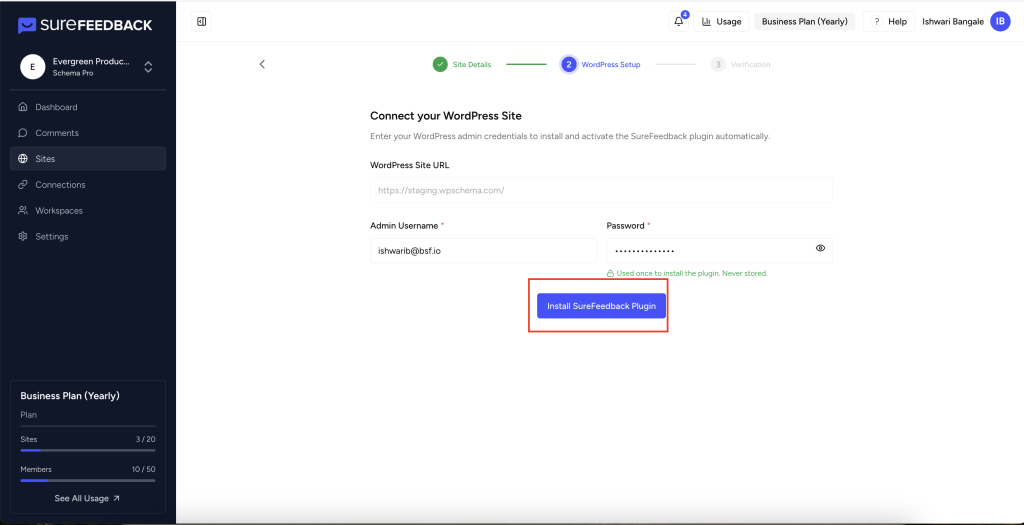
Step 6: Install and Activate the Plugin
When prompted, enter your WordPress admin username and password to allow SureFeedback to automatically install the plugin on your site.
Once your credentials are added, click Install Plugin.
This ensures that the SureFeedback plugin connects properly with your WordPress website, enabling you to start gathering feedback directly from your dashboard.

Step 7: Verify Your Connection
Once installed, follow the prompts to verify the connection.
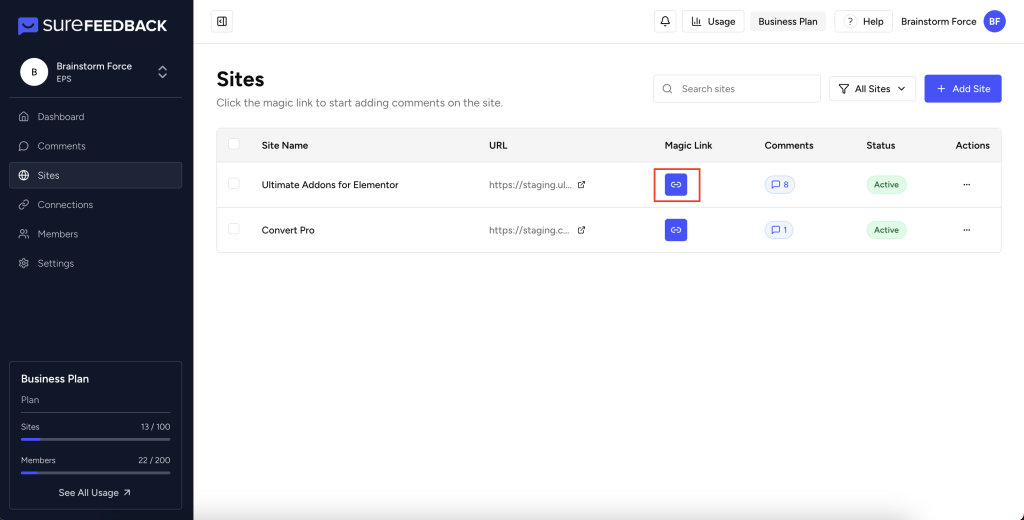
After verification, your website appears in your dashboard and sites tab, and is ready to collect feedback. Please access the site through magic link to start collecting the feedback

We don't respond to the article feedback, we use it to improve our support content.