Creating Your First Project in SureFeedback SaaS
Creating a project in SureFeedback lets you organize your websites and feedback efficiently. Here’s how to set up your first project step by step.
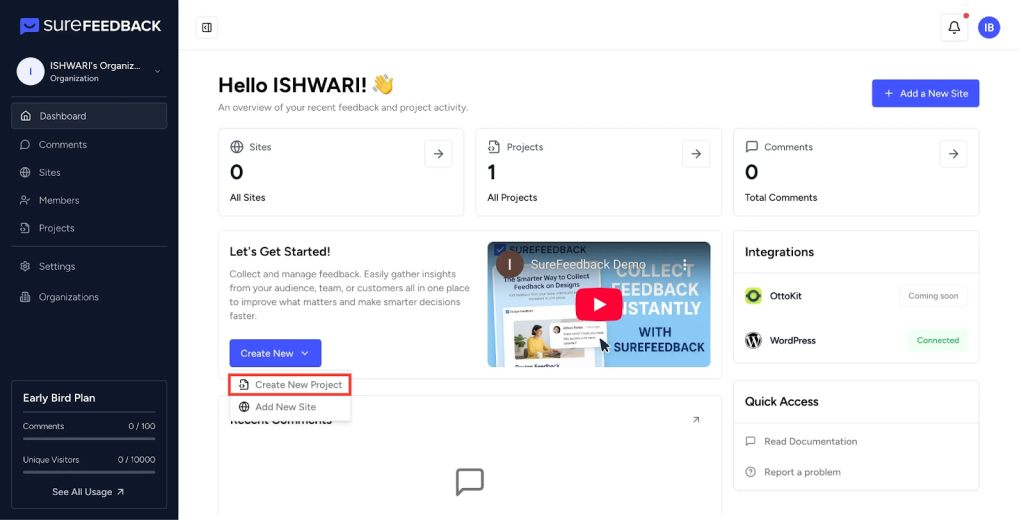
Step 1: Start from the Dashboard
- Log in to your SureFeedback dashboard.
- Click the Create New button.
- From the options, select Project.
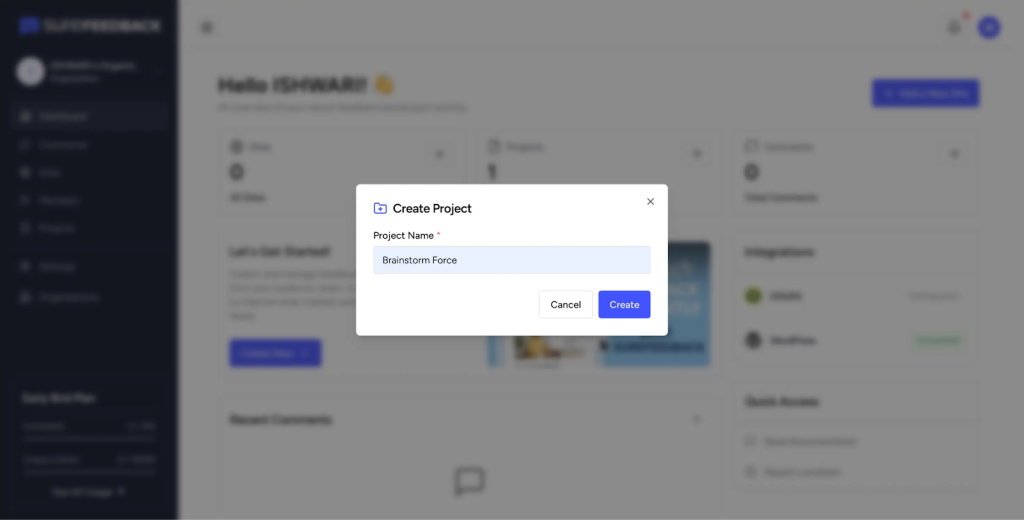
Step 2: Name Your Project
- Enter a name for your project that clearly describes its purpose or client.
- Click Create to open the project-specific screen.
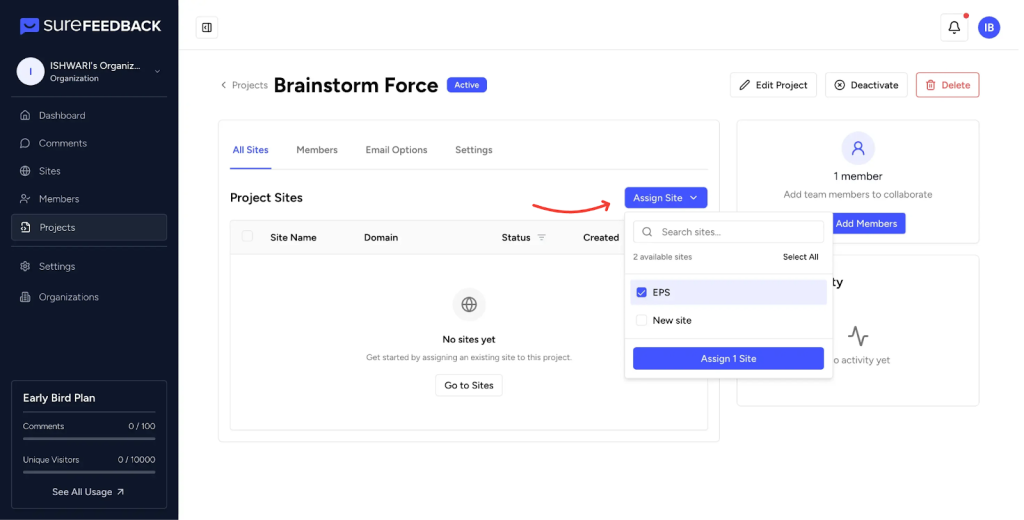
Step 3: Assign Sites to Your Project
- Inside the project screen, you can add sites directly.
- Click the Assign Site button.
- A dropdown will appear with all your added sites.
- Select the sites you want to include in this project.
If you don’t have any sites added yet, go to the Sites tab to add a new site.
Follow this article to add your WordPress site:
How to Add a WordPress Site on SureFeedback
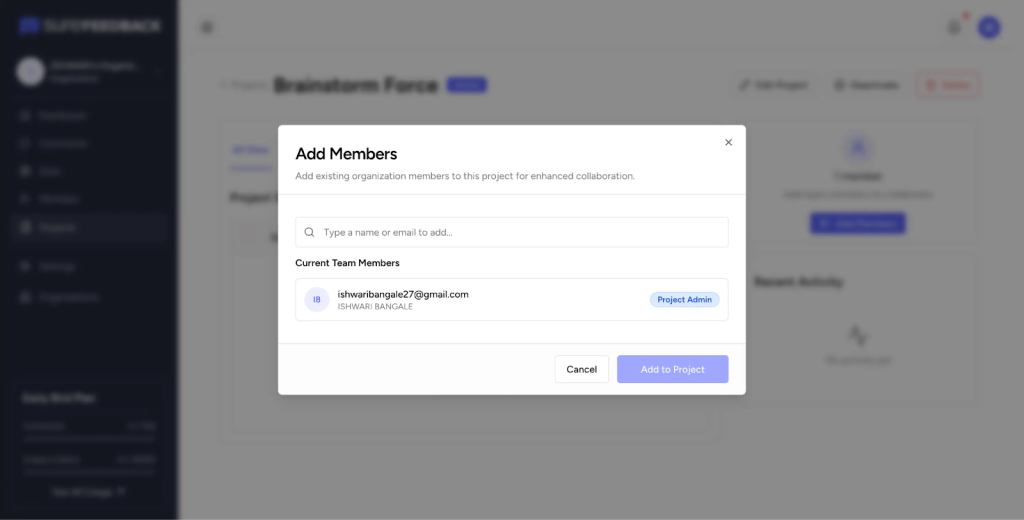
Step 4: Add Members to Your Project
- You can add members to collaborate within your project.
- Click the Add Member button in the project screen.
- If you don’t have members added to your organization, invite them first by following this guide:
- How to Invite Members to Your Organization
Members already in your organization will appear in a dropdown list.
Select the members you want to include in this project.
Step 5: Start Collecting Comments
- Once your sites and members are assigned to a project, users can begin adding comments.
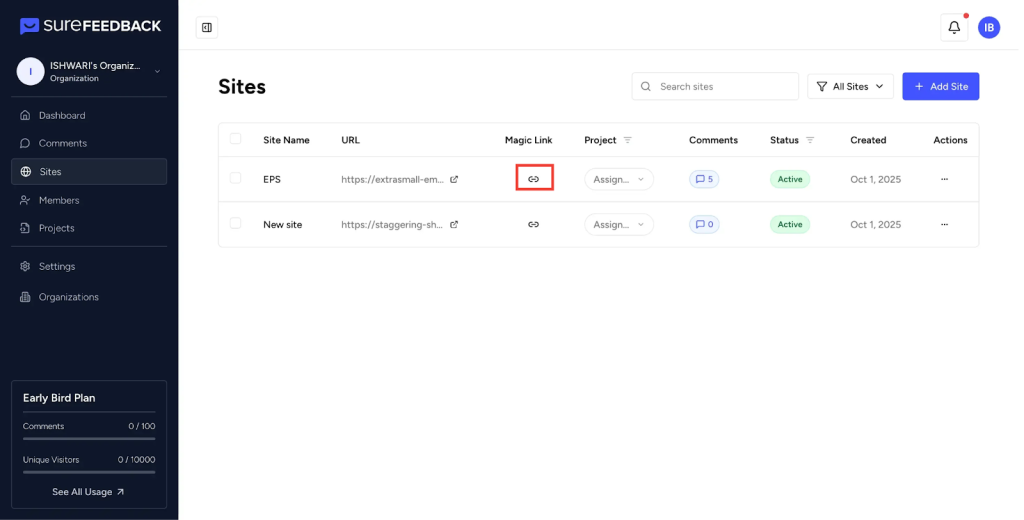
- To add comments, visit the Sites tab, access the site through the Magic Link, and start commenting on specific page elements.
If you want to learn the detailed process of adding comments, check this article:
Adding Your First Comment
By following these steps, you can quickly organize feedback for any website project and collaborate with your team effectively using SureFeedback.
We don't respond to the article feedback, we use it to improve our support content.