Adding Your First Comment on SureFeedback SaaS
With your website already added to SureFeedback, you can begin sharing feedback and collaborating right on your web pages. If you haven’t connected your site yet, follow the guide here:
How to Add a WordPress Site on SureFeedback
Step 1: Access Your Site via Magic Link
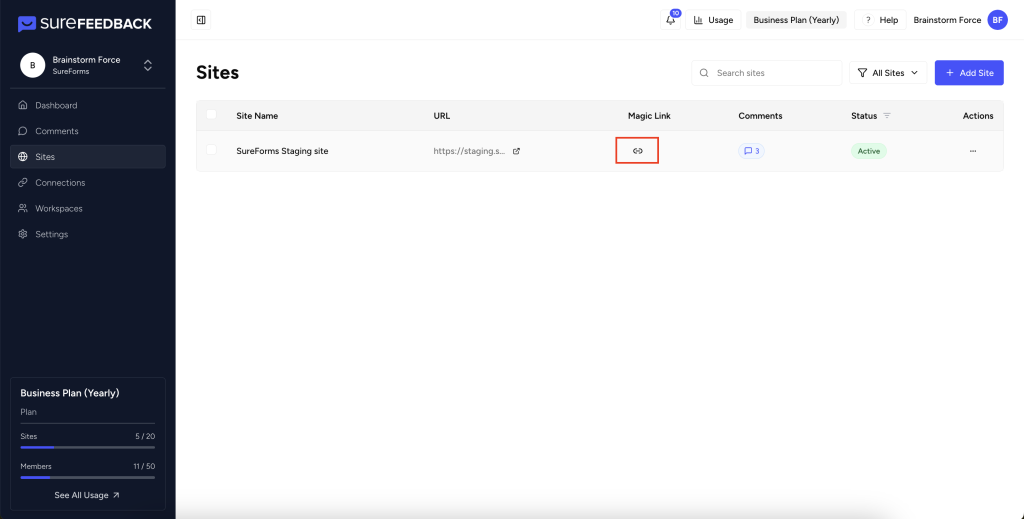
- Go to your SureFeedback dashboard and click on the Sites tab.
- Find the website you want to work on.
- Click the Magic Link button to securely open your site in feedback mode, no extra login required.

Step 2: Add a Marker and Leave a Comment
- On the website, find the element where you want to add a comment. After clicking on that element, a pop-up will open where you can enter your text.
- Click anywhere on the page where you want to add feedback, a comment box appears right there.
- Type your comment in the box.
You can also:- Attach files or screenshots to your comment.
- Assign the comment to a team member.
- Subscribe someone so they get notifications.
- Reply in a threaded conversation if you want to start a discussion.

Step 3: Set Comment Status
- Each comment can be marked as one of several statuses:
- Open
- In Progress
- Closed
- Resolved
Updating the status keeps everyone aware of progress and next steps.

Step 4: View and Manage Comments in the Dashboard
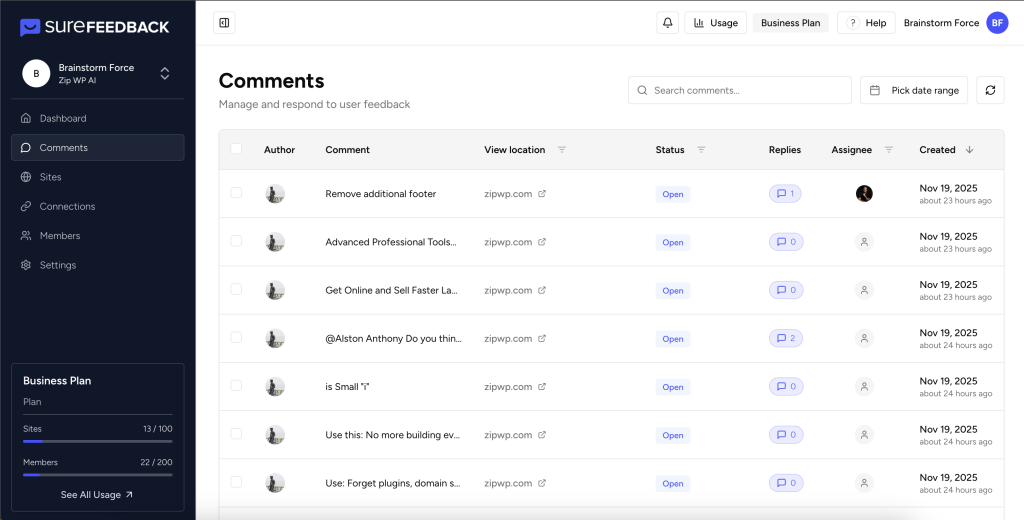
Back in your SureFeedback dashboard, all comments for your website are visible.
Here, you can:
- Filter comments by page, status, assignee, or creator.
- Reply to or resolve threads as needed in the offcanvas
- Organize feedback with clear tracking and responsibilities.

If you need to add a new site first, make sure to review the “How to Add a WordPress Site” article for step-by-step help connecting your site.
For any questions, always check the SureFeedback documentation or use the support link in your dashboard.
We don't respond to the article feedback, we use it to improve our support content.